Via Web-Browser
Zimbra, our web client for e-mail, allows you to easily organize your correspondence. With only a few clicks, you can create filters for your mail, automatically forward incoming mail to another account or set up an auto reply while you are on vacation.
The address for our webmail is
Spam Filter
All incoming email will be checked if it contains spam. It will be marked with a header tag in case of spam. To sort out this spam email you need to setup the following filter. The computer group is not allowed to do this for you.
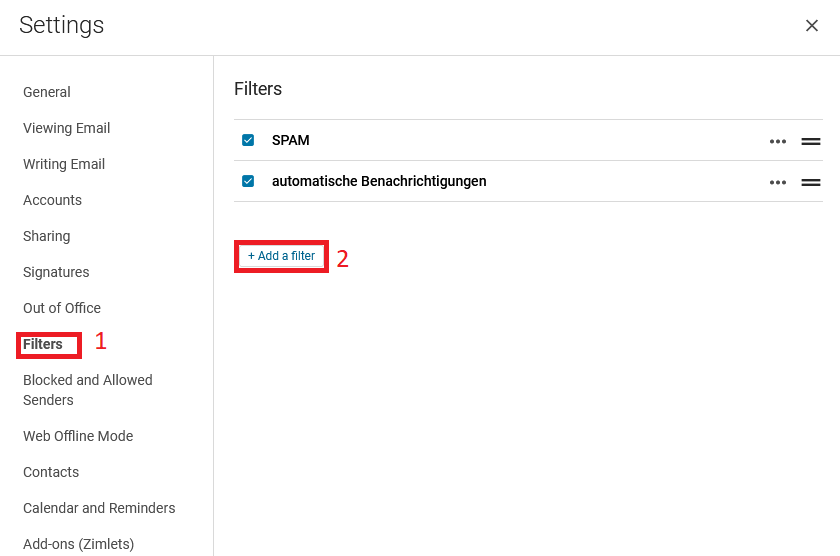
To set up this filter, please go to Settings → Filters and click on Add a Filter.
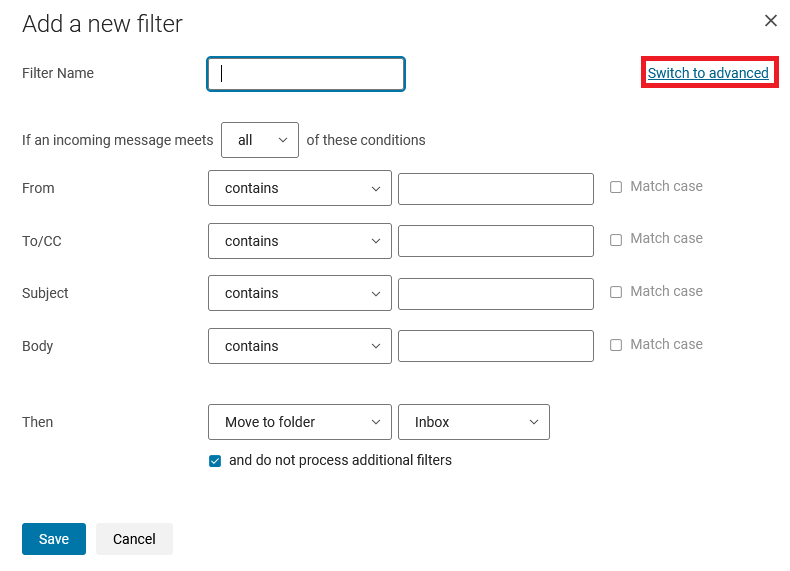
Please ‘switch to advanced’ to see all possible options.
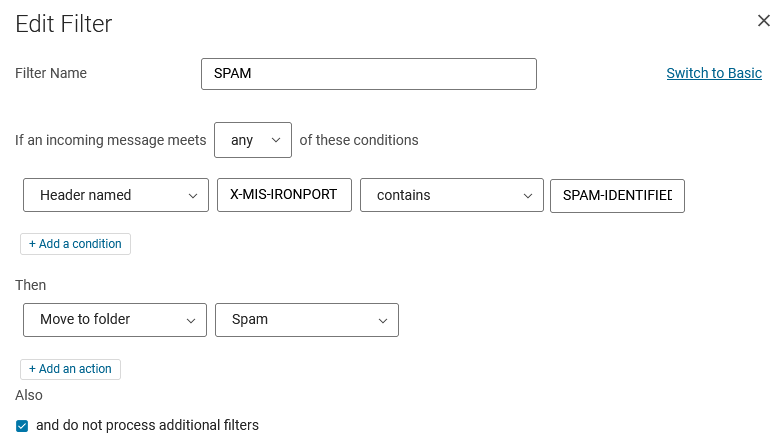
Give the filter a name, SPAM is recommended, and fill in all values as shown in the picture:
Choose any of the following conditions are met:
Header named → X-MIS-IRONPORT → contains → SPAM-IDENTIFIED
Then
Move to folder → Spam
Tick the box
and do not process additional filters
Don’t forget to save your settings two times:
button at the bottom of this page and also
at the settings overview page
Please check the folder “spam” regularly because sometimes there are false positives.
Mail forwarding
To forward incoming mail to another address, please do not use the function in Preferences → Mail. Instead create filter that forwards your mail.
Unfortunately, simply forwarding all emails will also forward spam. That can lead to a reputation problem for our mail server. To avoid this, it is recommended to use the following forwarding mechanism.
Please go to Preferences → Filters → Incoming Message Filters and click Create Filter.
The figure below shows how the contents of the filter must be structured:
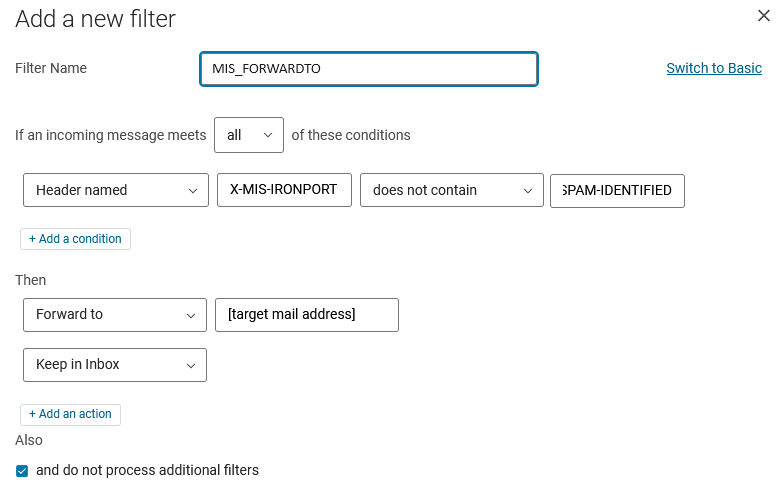
Filter name is MIS_FORWARDTO
Choose all of the following conditions are met:
Header named → X-MIS-IRONPORT → does not contain → SPAM-IDENTIFIED
Choose
Foward to your target mail address and
Keep in Inbox
Check the box at ‘do not process additional filters’
Keep attention that you don’t have an ‘invisble’ SPACE character around any string.
Email filtering
To set up or edit a filter, please go to Settings → Filters and click on Add a Filter.
Please ‘switch to advanced’ to see all possible options.
Remember, an email-address consists of two parts, the localpart and the domain (localpart**@**domain), which can be filtered separately. For example, the image below shows a filter which will sort any internal email (meaning everything like someone@mis.mpg.de) into a folder called MIS.
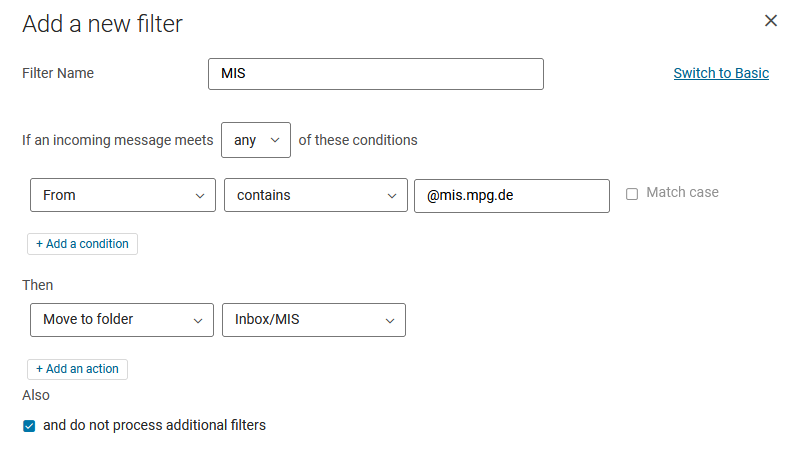
Also note that the correct order of the filters is important, especially if the tick for Do not process additional filters is set. Don’t forget to save your settings two times: button at the bottom of this page and also at the settings overview page
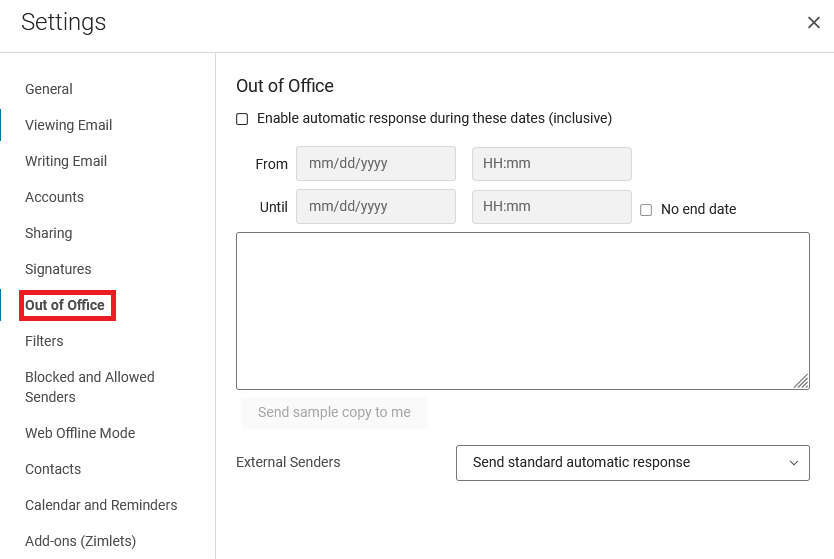
Auto reply
If you are not able to read your mail for a time, you can set up an auto reply. To do so, simply click on Settings → Out of Office, set the tick to enable automatic response during these dates and enter your message in the field below.
Also, set a tick after Time Period and select when the auto-reply message should be sent.
If you want to differ between internal mail (anyone@mis.mpg.de) and external mail, select Send different auto-reply message to external senders.
Also, it is advised to set the auto-reply a few days before you actually leave office, so people trying to contact you will know you are not available for a time.
Back up your email (offline)
Open Zimbra Webmail.
Navigate to Settings → Accounts
Scroll down to the Export section and click on Export to back up your entire mailbox. A tgz-file will be downloaded to your local Hard-drive.
If you only want a backup of specific folder or mails, select them by right-clicking.
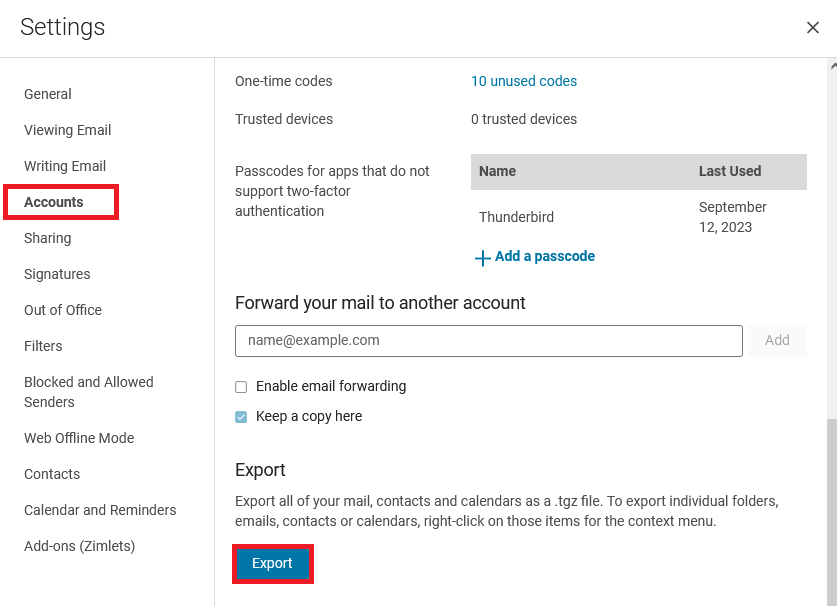
Note: This is an offline back-up, so you’ll need a mail client like Thunderbird to import it from your local disk.
Drag and Drop to Import EML to Mozilla Thunderbird
If that does not work: This is how to import EML files into Thunderbird manually.
Unpack the downloaded tgz-file. Depending on your operating system using linux-command-line or WinZip/7Zip for macOS or Windows.
Open Thunderbird, right-click on your Inbox → create ‘New Folder’. This will be the folder to copy all your backed-up mails.
Afterward, go to the folder where the EML files are located, that you would like to import to Thunderbird. There, select a file or group of files and drag them to the newly created subfolder in Mozilla Thunderbird.
Now, the messages should appear in the Thunderbird folder that has been recently created.